Flutter Calendar App Optimizing Query and Managing Events
In previous two parts we learned to setup calendar and load and display events from Firestore. In this third and final part in the series, we will optimize the Firestore query so that we will only load the events necessary for the visible days in the calendar. Then we will also setup CRUD to allow to add, update and delete the events.
Part 2: Loading & Displaying Events from Firestore in Flutter Calendar App
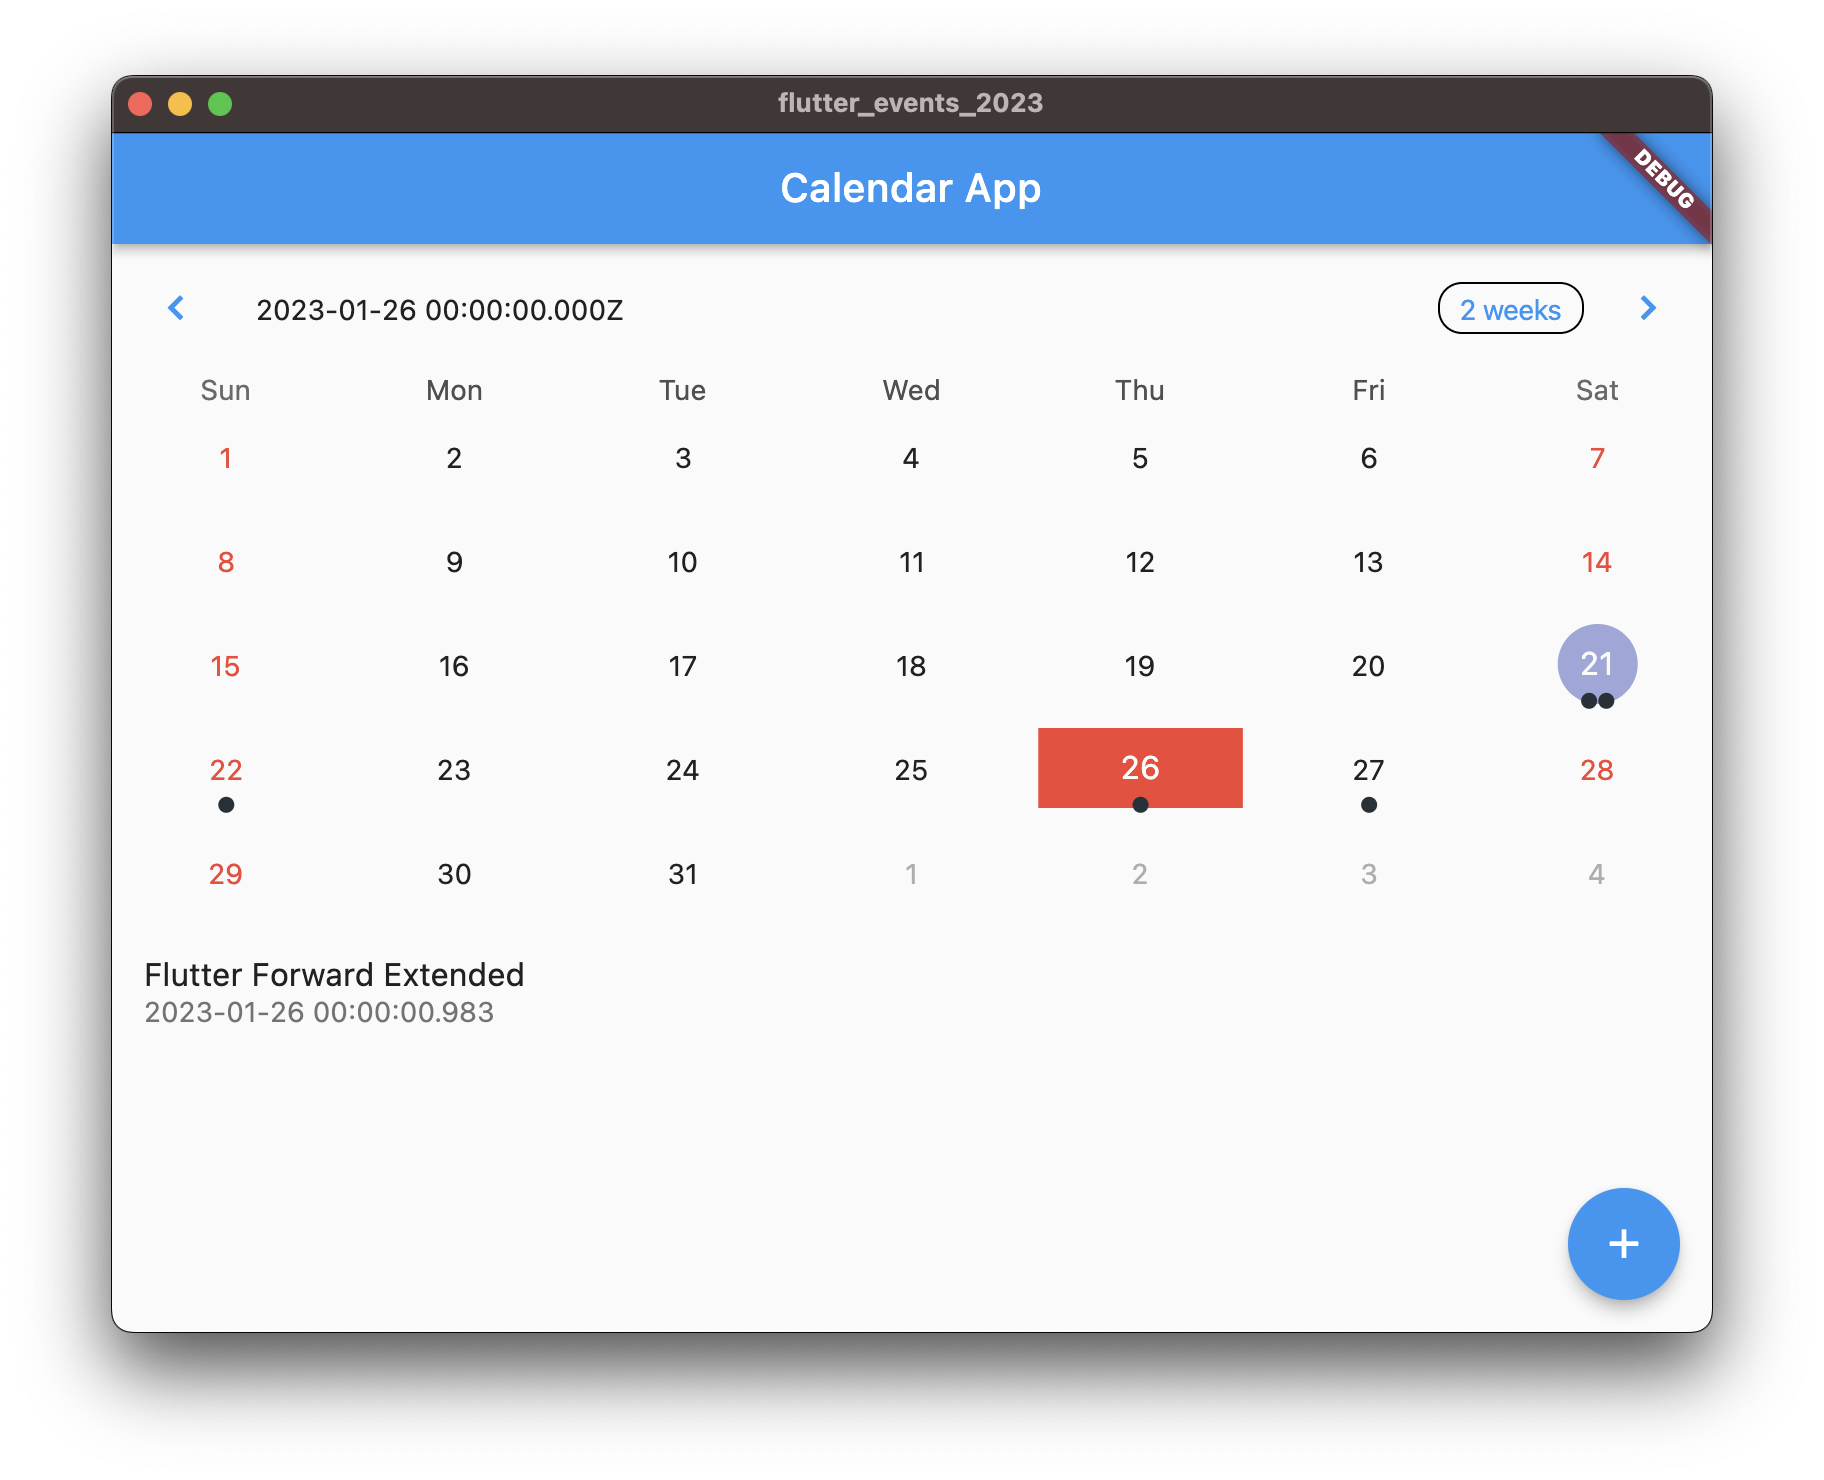
List Events of the Selected Day
Wrap
TableCalendarwithListViewbody: ListView( children: [ TableCalendar( //... ), ], ),We already have
_selectedDayand_getEventsForTheDayso we just loop through the events based on the_selectedDayand then display them. I’m usingListTileto display it below the calendar itself insideListViewas the followingbody: ListView( children: [ TableCalendar( //... ), ..._getEventsForTheDay(_selectedDay).map( (event) => ListTile( title: Text( event.title, ), subtitle: Text( event.date.toString(), ), ), ), ], ),
Next, lets optimize the Firestore query to load only the events for the current month displayed in the calendar.
Query Optimization
Right now we are loading all the events from Firestore, no matter the visible month. (we can also calculate visible dates based calendar format, if you are using weekly or two week format. However to keep things simple, I’ll use the visible month). To do this, using the _focusedDay we will calculate the first day and last day of the month of the _focusedDay and use that information to query the Firestore database.
First get first and last day of the month based on
_focusedDay_loadFirestoreEvents() async { final firstDay = DateTime(_focusedDay.year, _focusedDay.month, 1); final lastDay = DateTime(_focusedDay.year, _focusedDay.month + 1, 0); _events = {}; ... }We are also clearing out the
_eventsso that we don’t get duplicates each time we load.Next, let’s update the Firestore query to use the first and last day we calculated above.
_loadFirestoreEvents() async {
  final firstDay = DateTime(_focusedDay.year, _focusedDay.month, 1);
  final lastDay = DateTime(_focusedDay.year, _focusedDay.month + 1, 0);
  _events = {};

  final snap = await FirebaseFirestore.instance
      .collection('events')
      .where('date', isGreaterThanOrEqualTo: firstDay)
      .where('date', isLessThanOrEqualTo: lastDay)
      .withConverter(
          fromFirestore: Event.fromFirestore,
          toFirestore: (event, options) => event.toFirestore())
      .get();
  //...
}
Here, we are loading only the events that have
dategreater than or equal tofirstDayand lessThanOrEqualTolastDayFinally, in order for the events to change, whenever the page changes, we need to call it in
onPageChangedcallback as the following.ListView( children: [ TableCalendar( //... onPageChanged: (focusedDay) { setState(() { _focusedDay = focusedDay; }); _loadFirestoreEvents(); // call this }, ), //... ], ),We call
_loadFirestoreEventsfunction after updating_focusedDay.
Now we have optimized our event loader so that we don’t overuse Firestore and optimize performance as well. Next we will learn to add new events.
Add new events
Create a stateful widget as the following
class AddEvent extends StatefulWidget { final DateTime firstDate; final DateTime lastDate; final DateTime? selectedDate; const AddEvent( {Key? key, required this.firstDate, required this.lastDate, this.selectedDate}) : super(key: key); State<AddEvent> createState() => _AddEventState(); } class _AddEventState extends State<AddEvent> { late DateTime _selectedDate; final _titleController = TextEditingController(); final _descController = TextEditingController(); void initState() { super.initState(); _selectedDate = widget.selectedDate ?? DateTime.now(); } Widget build(BuildContext context) { return Scaffold( appBar: AppBar(title: const Text("Add Event")), body: ListView( padding: const EdgeInsets.all(16.0), children: [ InputDatePickerFormField( firstDate: widget.firstDate, lastDate: widget.lastDate, initialDate: _selectedDate, onDateSubmitted: (date) { setState(() { _selectedDate = date; }); }, ), TextField( controller: _titleController, maxLines: 1, decoration: const InputDecoration(labelText: 'title'), ), TextField( controller: _descController, maxLines: 5, decoration: const InputDecoration(labelText: 'description'), ), ElevatedButton( onPressed: () { _addEvent(); }, child: const Text("Save"), ), ], ), ); } void _addEvent() async { // save event to Firestore } }Add a floating action button to our existing widget where we display table calendar that will navigate to our
AddEventpage.Scaffold( //... floatingActionButton: FloatingActionButton( onPressed: () async { await Navigator.push( context, MaterialPageRoute( builder: (_) => AddEvent( firstDate: _firstDay, lastDate: _lastDay, selectedDate: _selectedDay, ), ), ); }, child: const Icon(Icons.add), ), );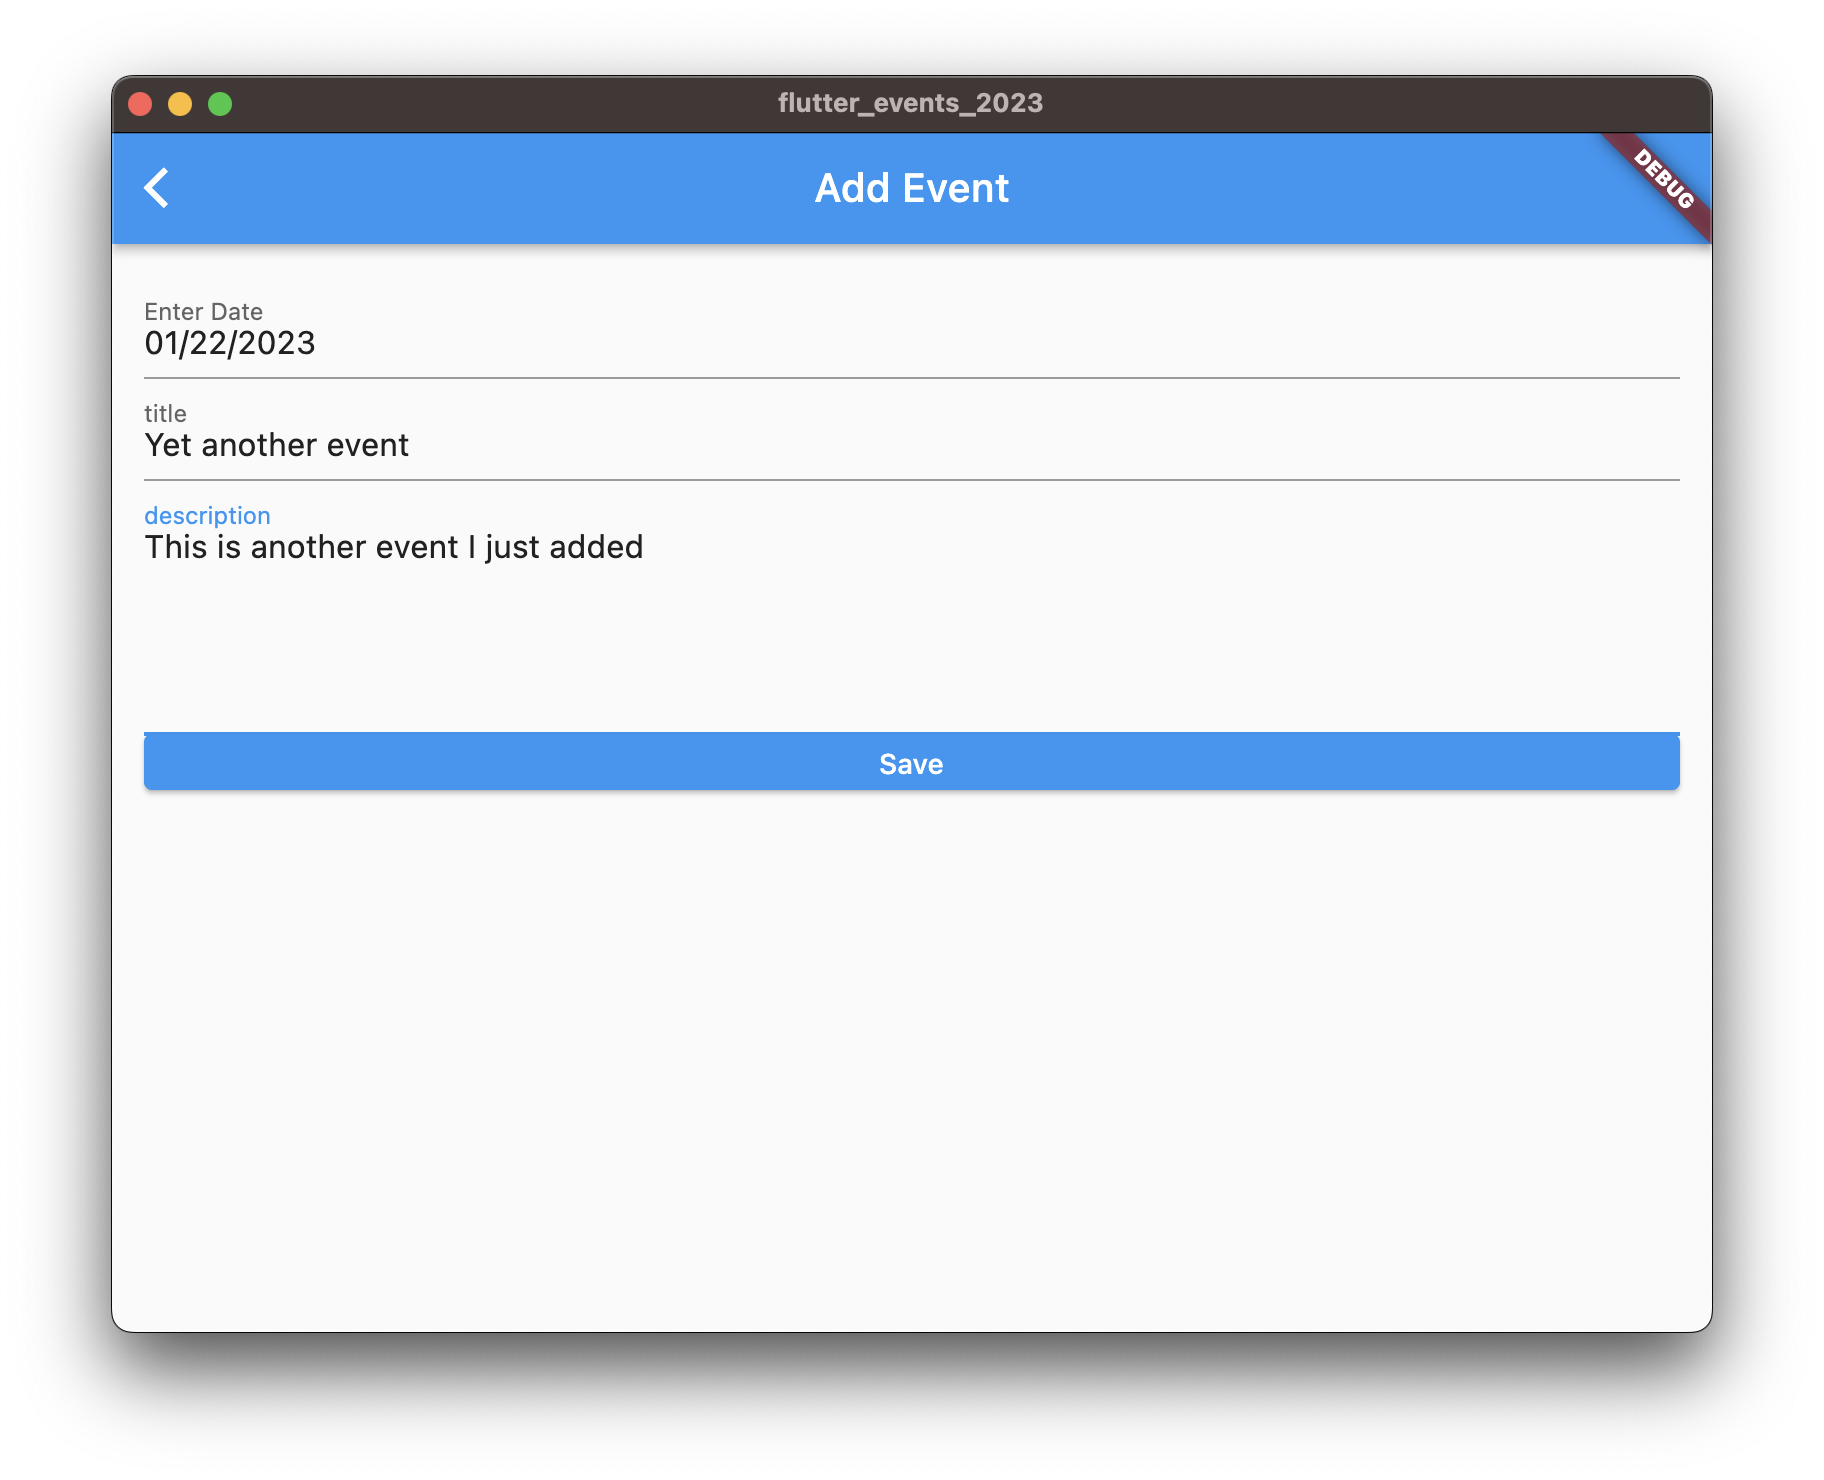
Update the
_addEventfunction to add to Firestorevoid _addEvent() async { final title = _titleController.text; final description = _descController.text; if (title.isEmpty) { print('title cannot be empty'); // you can use snackbar to display erro to the user return; } await FirebaseFirestore.instance.collection('events').add({ "title": title, "description": description, "date": Timestamp.fromDate(_selectedDate), }); if(mounted) { Navigator.pop<bool>(context, true); } }Update, the onPressed function of floating action button on the previous page so that after pop is called and if the returned value is true, we call
_getFirestoreEventsagain to load newly added events.floatingActionButton: FloatingActionButton( onPressed: () async { final result = await Navigator.push<bool>( //... ); if (result ?? false) { _loadFirestoreEvents(); } }, child: const Icon(Icons.add), ),You can also use realtime capability of Firestore instead, i’m just keeping things simple and concentrating on the calendar. You can similarly implement the functionality to delete event and update event. If you get confused look at the final code in the repository that has delete and update functionality implemented as well as some improvements to the code.
That’s all. I hope you enjoyed the tutorial. The final code for this part is in part 3 branch of the repository.
https://github.com/lohanidamodar/flutter_events_2023/tree/p3-optimization-and-more
You can also find, in the final branch updated version with update and delete functionality implemented and some quality of life improvements to the code and organization.
https://github.com/lohanidamodar/flutter_events_2023
If this tutorial was helpful, share it with your community.
Enjoyed? Tell your friends.